
Butterfly Patchwork Quilt
Choose your finished size and do the “math” first (so everything fits perfectly)
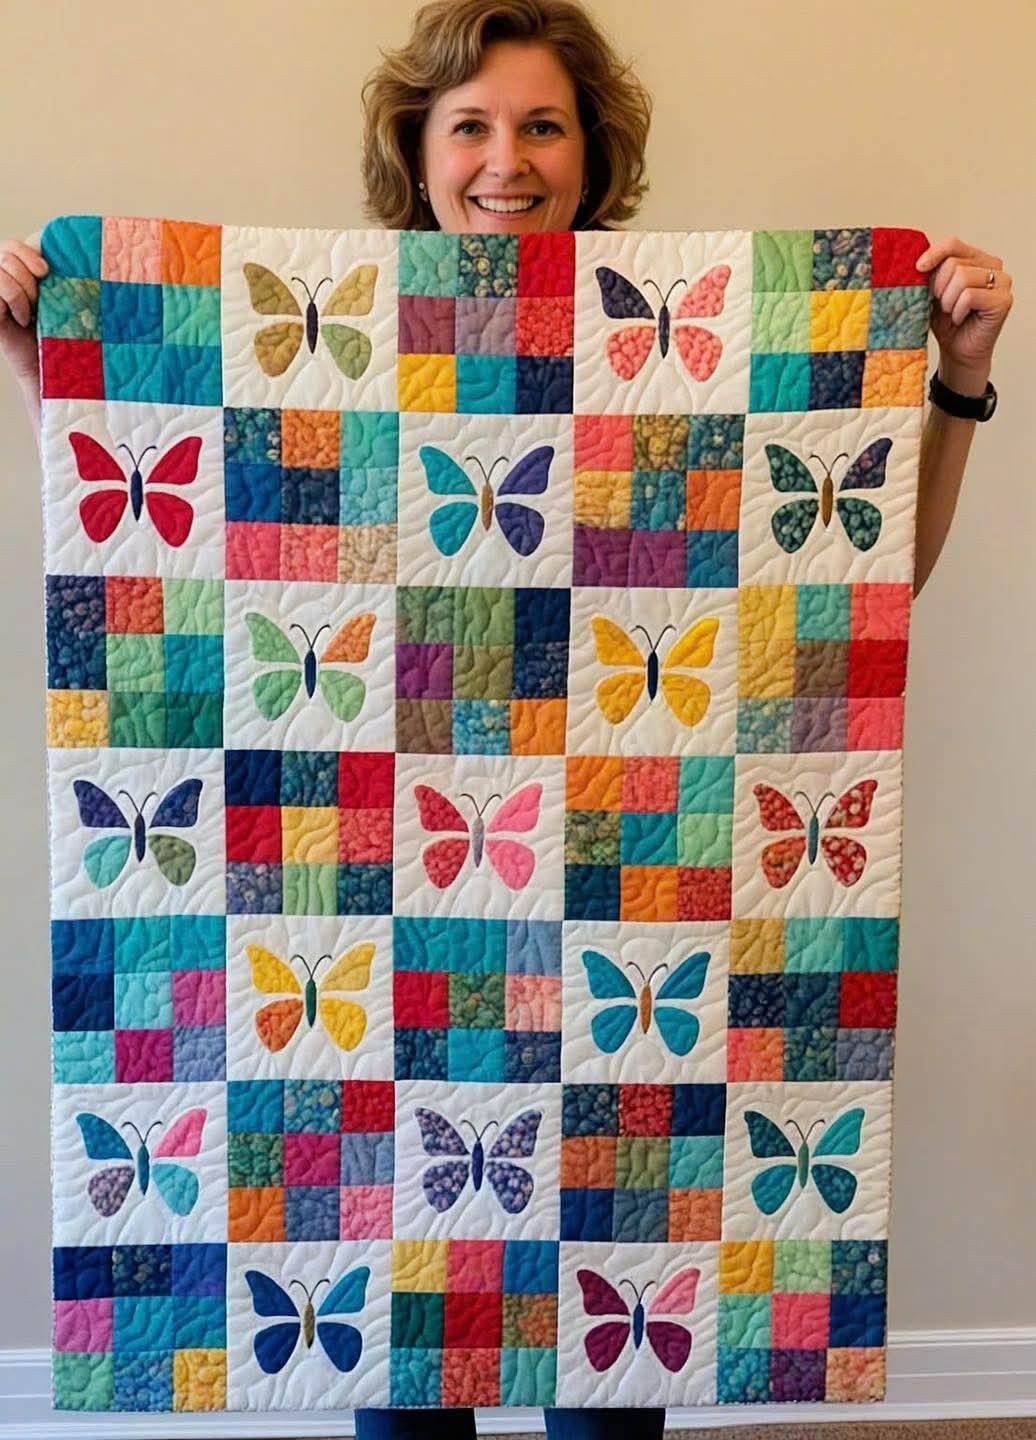
This quilt is built from one repeated block size. In the photo, each block looks like a medium “throw” scale, and a very common choice that matches this look is an 8″ finished block (each block finishes at 8″ once sewn into the quilt). With a 5 blocks wide × 7 blocks tall layout, your quilt top finishes at 40″ × 56″ (before quilting and binding). If you want it larger, keep the same design but make the blocks bigger (for example, 10″ finished blocks would give you 50″ × 70″). The steps below use 8″ finished blocks because they’re practical, quick, and the proportions match the photo well.
For an 8″ finished block, you need each block to be 8½” unfinished (because quilt seams are typically ¼”). That means: your butterfly background squares are cut at 8½” × 8½”, and your 4-patch blocks are built to also measure 8½” × 8½” unfinished.
2) Materials and fabric planning (how to get the same “scrappy rainbow” look)
To copy the style in the photo, plan on three fabric groups: (1) bright solids, (2) bright prints, and (3) a clean white or off-white background for the butterfly blocks. The charm of this quilt comes from mixing colors freely—turquoise, teal, coral, orange, yellow, purple, navy, lime—so don’t overthink matching. If you have scraps, this is the perfect project. You’ll also need fusible web (paper-backed) for appliqué, and either matching thread for invisible stitching or a slightly contrasting thread if you want the appliqué to stand out.
Batting and backing depend on your final size, but for a 40″ × 56″ top you’ll typically want backing and batting at least 4″ larger on each side (so around 48″ × 64″ minimum; bigger is safer). For binding, you can use a solid that “holds” all the colors together (teal, navy, or a warm gray) or a multicolor print.
3) Block counts for the exact layout in the photo (5 × 7 checkerboard)
With 35 total blocks, and a checkerboard arrangement starting with a scrappy block in the top-left (like the photo), you will make 18 scrappy 4-patch blocks and 17 butterfly appliqué blocks. The easiest way to assemble without confusion is to decide your layout early: Row 1 starts with scrappy, Row 2 starts with butterfly, Row 3 starts with scrappy, and so on, alternating each row. That automatically creates the checkerboard.
4) Cutting list for 8″ finished blocks (simple and reliable)
Butterfly background squares (white)
Cut 17 squares at 8½” × 8½” from your white/background fabric. Press them well and keep them clean—crisp background is a big part of the modern look.
Scrappy 4-patch blocks
Each scrappy block is made from four squares that finish as a neat four-patch. To end up with an 8½” unfinished 4-patch block, each of the four squares must be 4½” × 4½” (because two squares side-by-side = 9″, then seams reduce to 8½”).
So you need: 18 blocks × 4 squares each = 72 squares, each cut 4½” × 4½”, in a mix of colors and prints.
A tip that makes the photo’s look work: avoid placing two very similar colors in the same 4-patch. Aim for “high contrast” inside each scrappy block—like teal next to coral, or navy next to yellow—so every block has energy.
5) Make the scrappy 4-patch blocks (fast method that keeps them perfectly square)
Take four 4½” squares and arrange them into a 2 × 2 layout you like. Sew the top two squares together with a precise ¼” seam, then sew the bottom two squares together. Press the seams of the top unit to one side and the seams of the bottom unit to the opposite side (this matters), then place the two units right sides together and sew across the center seam. Because the seams are pressed opposite directions, they “nest,” which helps you match the center intersection cleanly. Press the final seam open if you prefer flatter quilting, or press to one side for speed—either is fine as long as the block measures 8½” × 8½”. Make all 18 of these blocks, and keep them in a stack.
6) Create the butterfly appliqué template (and how to get the same “chunky wing” style)
The butterflies in the photo look like a simple, bold silhouette with four wing pieces (upper left, lower left, upper right, lower right) plus a narrow body and thin antennae. You can draft this yourself on paper: draw a vertical centerline, sketch one side of the butterfly (upper and lower wing), then fold on the centerline and cut so both sides match. Next, split the wing shape into two parts (upper wing and lower wing) so you end up with four separate wing templates when mirrored, and then add a slim body template.
When you use fusible web, remember this: fusible web is traced in reverse because you iron it to the wrong side of the fabric. That means you should label your templates clearly: “Upper Wing (mirror), Lower Wing (mirror), Body.” If you want perfect symmetry every time, cut one set of templates from template plastic or cardstock and reuse them.
7) Appliqué with fusible web (clean edges, beginner-friendly, and matches the photo)
Cut a piece of fusible web slightly larger than each wing template. Trace each wing shape onto the paper side of the fusible web (again: trace mirror images), then roughly cut around the shapes leaving a small margin. Iron those fusible shapes onto the wrong side of your chosen wing fabrics. Once fused, cut precisely on the traced lines to get crisp wing pieces. Do the same for the body (often a dark fabric works best—navy, black, or deep teal).
Now lay one white 8½” background square on your pressing surface and arrange the butterfly pieces. A reliable placement is to center the body vertically and horizontally in the block, then place the wings so there’s a small, consistent gap between wing edges and the body (the photo has a clean separation that keeps the design modern). Once you like the layout, peel the paper backing off each piece, then fuse the wings and body in place according to your fusible product instructions. Repeat until you have 17 butterfly blocks.
To secure the appliqué permanently, stitch around each piece. A small satin stitch gives a bold outline; a tight zigzag is easier and still durable; a blanket stitch looks traditional; and a straight stitch close to the edge gives the most modern “hand-drawn” look. The quilt in the photo reads as clean and modern, so a narrow zigzag or straight stitch is a good match. Go slowly around curves, and pivot with the needle down.
8) Optional: add antennae (two easy ways)
If you want antennae like the photo, you can do it with thread or with fabric. The easiest and neatest method is to embroider them: after the body is fused, draw two gentle antenna curves with a removable marker, then use a dense straight stitch (or a narrow zigzag) to “draw” the antennae with thread. If you prefer fabric antennae, you can appliqué two thin strips, but thread is faster and looks cleaner at this scale.
9) Design wall layout (this is where the quilt starts to look “right”)
Put your blocks on a design wall or clean floor in a 5 × 7 grid. Start with a scrappy block in the top-left, then alternate across the row: scrappy, butterfly, scrappy, butterfly, scrappy. For the second row, start with butterfly, then scrappy, and keep alternating. Continue for all 7 rows. At this stage, step back and check color balance: make sure you don’t have all the warm colors clumping in one corner or too many similar blues touching. A quick fix is simply swapping a few scrappy blocks or changing which butterfly colors sit near each other until the whole quilt looks evenly “sprinkled” with color.
10) Assemble the quilt top (row-by-row is the least stressful)
Sew the blocks into rows first. Take Row 1 and sew block 1 to block 2, then add block 3, and so on until the row is complete. Press seams for each row in alternating directions (for example, press Row 1 seams to the right, Row 2 seams to the left, Row 3 to the right). This alternating press direction helps the seams nest when you sew rows together, giving you better alignment and flatter intersections.
Once all 7 rows are made, sew Row 1 to Row 2, then add Row 3, and continue until the full quilt top is assembled. Press carefully, and measure the quilt top to confirm it is square-ish before quilting. If you notice a slight wave, it’s usually from pressing or seam consistency—gentle pressing (not ironing back and forth) helps a lot.
11) Baste, quilt, and get that “soft wavy” texture from the photo
Layer your backing (wrong side up), batting, and quilt top (right side up), then baste using your preferred method: safety pins, spray basting, or thread basting. The quilting in the photo looks like a free-motion meander or organic wavy lines that flow across blocks without stopping at seams. That style is forgiving and perfect for a colorful quilt because it adds texture without competing with the design.
If you’re new to free-motion quilting, practice the motion on a small sandwich first. Use a walking foot if you prefer straight or gently wavy lines across the quilt; you can still achieve a soft modern texture by quilting vertical wavy lines 1–2″ apart. The key is consistency and keeping the quilt supported so it doesn’t drag.
12) Bind, label, and finish (the last steps that make it look professional)
Trim your quilt edges square, then add binding. For binding strips, a standard choice is 2½” wide strips (joined into a continuous length). Attach binding to the front with a ¼” seam, fold to the back, and hand-stitch or machine-stitch to finish. Because this quilt is so colorful, binding in a deep teal, navy, or a multicolor print can look especially polished. Finally, add a small label with the date and your name—future you will be glad you did.
Quick recap of the exact “recipe” for the photo look (8″ finished blocks)
-
Layout: 5 × 7 blocks = 35 blocks total
-
Blocks: 18 scrappy 4-patch blocks + 17 butterfly appliqué blocks
-
Cutting:
-
Butterfly backgrounds: 17 squares at 8½”
-
Scrappy squares: 72 squares at 4½” (4 per 4-patch block)
-
-
Appliqué: fusible web + edge stitching (straight stitch or narrow zigzag for a modern look)