Learn to Make a Variety of Quilt Blocks
Learn to Make a Variety of Quilt Blocks: A Step-by-Step Guide
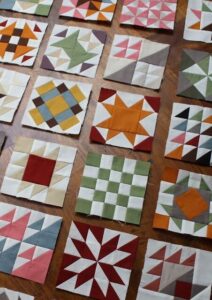
Quilting is an art form that blends color, geometry, and craftsmanship. One of the most enjoyable parts is creating different quilt blocks — the building pieces that make up a full quilt.
In this guide, we’ll walk through five classic quilt blocks, each teaching different techniques that you can mix and match in your projects.
Materials You’ll Need
-
100% cotton fabrics (2–4 coordinating colors or prints)
-
Rotary cutter, ruler, and self-healing mat
-
Sewing machine and thread
-
Iron and ironing board
-
Quilting pins or clips
Tip: Always starch and press your fabric before cutting. Precision in cutting = perfect points!
The Nine-Patch Block
Skill: Beginner
Technique: Straight piecing
Steps:
-
Cut 5 light and 4 dark squares, each 2½” x 2½”.
-
Arrange them in a checkerboard pattern (dark-light-dark across the rows).
-
Sew three rows of three squares each, pressing seams alternately.
-
Join the rows, matching the seams.
-
Trim to 6½” square (finishes at 6” when sewn into a quilt).
Variation: Try using scraps for a scrappy nine-patch look!
The Half-Square Triangle (HST) Block
Skill: Beginner to Intermediate
Technique: Triangle piecing
Steps:
-
Place two fabric squares right sides together (e.g., 5” x 5”).
-
Draw a diagonal line corner to corner.
-
Sew ¼” away from both sides of that line.
-
Cut along the drawn line — you’ll get two triangles!
-
Press open and trim each HST to 4½” square.
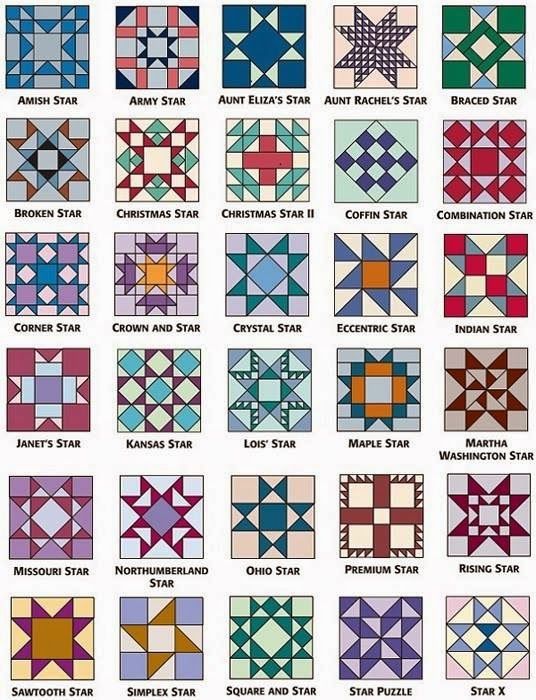
Design ideas: Combine HSTs to create patterns like “Pinwheel,” “Hourglass,” or “Diamond Star.”
The Log Cabin Block
Skil: Intermediate
Technique: Strip piecing
Steps:
-
Start with a 2½” center square (traditionally red for “the heart of the home”).
-
Sew a light strip to the right, press, then a dark strip to the bottom.
-
Continue adding strips clockwise — light on two adjacent sides, dark on the other two.
-
Keep going until your block reaches your desired size (e.g., 12½”).
Variation: Alternate dark/light sides for strong contrast or use ombré fabrics for a modern twist.
The Flying Geese Block
Skill: Intermediate
Technique: Stitch-and-flip
Steps:
-
Cut one rectangle 3½” x 6½” (goose) and two squares 3½” x 3½” (sky).
-
Place one square on the rectangle’s corner, right sides together.
-
Draw a diagonal line and sew on it; trim excess, leaving ¼” seam.
-
Repeat on the other side to form your “goose.”
-
Trim to 3½” x 6½”.
Tip: Four Flying Geese blocks form a beautiful “Dutchman’s Puzzle” pattern.
The Churn Dash Block
Skill: Intermediate
Technique: Combining HSTs and rectangles
Steps:
-
For a 6½” block, cut:
-
1 center square: 3½” x 3½”
-
4 HSTs (light/dark): 3½” x 3½”
-
4 rectangles: 2” x 3½”
-
-
Arrange as a nine-patch: HSTs in corners, rectangles on sides, square in center.
-
Sew rows, press, and join.
Fun fact: The Churn Dash is one of the oldest traditional blocks, dating back to the 1800s.
Putting It All Together
Once you’ve made several blocks (say, 12 to 20), arrange them into a layout.
Alternate light and dark blocks to create visual rhythm. Add sashing (1½” strips between blocks) and borders (3–5” wide) to frame your quilt beautifully.
Final Tips for Success
-
Keep a ¼” seam allowance consistent across all blocks.
-
Press, don’t iron — lift and press to avoid stretching fabric.
-
Square up blocks after sewing to ensure perfect alignment.
-
Mix patterns and colors to give each block personality.
In Summary
Learning multiple quilt blocks gives you the flexibility to design your own unique quilts. Start simple with the Nine-Patch and HST, then explore Log Cabin and Churn Dash for more complex compositions. Each block you master builds your confidence and expands your creative library.