
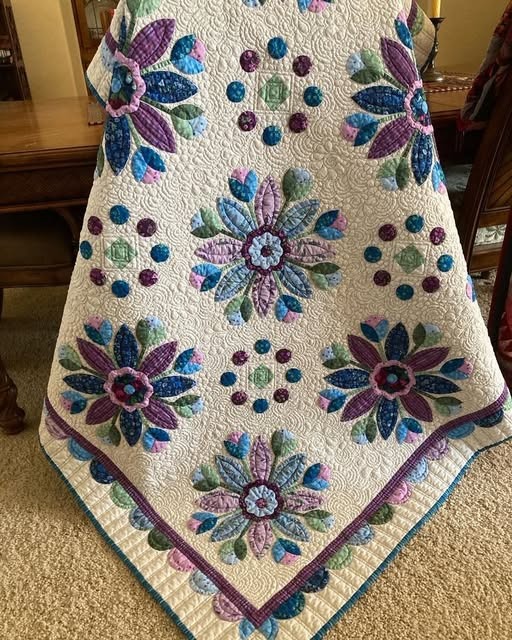
Scalloped Dresden Garden
To recreate the intricate floral design from the second image, you are looking for a technique called Dresden Plate Appliqué combined with Free-Motion Quilting.
Here is the complete step-by-step guide to achieving this look:
Project Name: Scalloped Dresden Garden
Materials Needed
-
Background Fabric: High-quality white or cream cotton.
-
Assorted Prints: Various blue, purple, and green floral fabrics for the petals and circles.
-
Dresden Plate Ruler: An 18° or 36° wedge ruler (depending on how many petals you want).
-
Appliqué Supplies: Fusible web (like HeatnBond Lite) or freezer paper for turned-edge appliqué.
-
Thread: Matching cotton thread for appliqué and a contrasting or neutral thread for quilting.
Step-by-Step Instructions
1. Creating the Dresden Plates
-
Cut Wedges: Use your wedge ruler to cut the petals from your colored fabrics.
-
Pointed Tips: Fold each wedge in half lengthwise (right sides together) and sew across the top wide end. Turn it right side out and press to create a pointed petal.
-
Join Petals: Sew the sides of the petals together to form a circular “plate.” You will need about 16 to 20 wedges per plate.
2. Center and Decorative Circles
-
The Centers: Cut large circles for the middle of each Dresden Plate. Use the “tin foil method” or fusible web to turn the edges under for a clean look.
-
Small Accent Dots: Notice the rings of small circles between the large flowers. Cut these using a circular template and prepare them for appliqué.
3. Layout and Appliqué
-
Positioning: Arrange your Dresden Plates in a staggered “checkerboard” layout on your background fabric.
-
Secure: Pin or fuse the plates and all small accent circles onto the background.
-
Sew: Use a tiny blanket stitch or a blind hem stitch on your machine to sew around every petal and circle.
4. Decorative Border
-
Scalloped Edge: The border features a scalloped “fan” pattern. Cut small petal shapes and align them along the inner border line, overlapping them slightly to create the continuous wave effect shown in the image.
5. Professional Free-Motion Quilting
This is what gives the blanket its “texture.”
-
Background Filling: Use a “Pebble” or “McTavishing” stitch pattern (swirling lines) to fill the white space. This makes the colorful flowers “pop” forward.
-
Detail Quilting: Sew straight lines or “veins” down the center of each colored petal to add dimension.
6. Finishing
-
Binding: Finish with a thin, dark purple or blue binding to frame the work, as seen in the photo.