
Christmas Tree Quilted Pillow Cover
Christmas Tree Quilted Pillow Cover: Step-by-Step Guide
Advertising
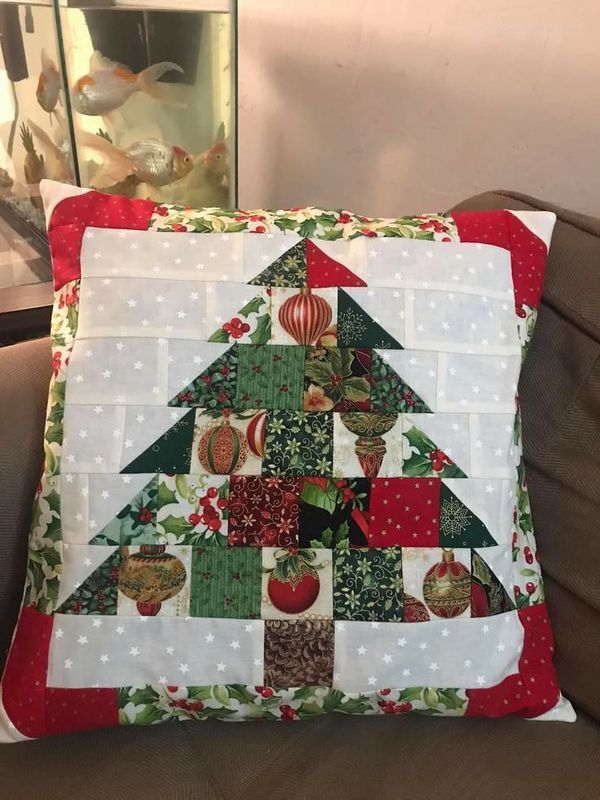
This pillow uses simple Half-Square Triangles (HSTs) to form the tree and background rectangles (bricks) to create the festive backdrop.
I. Materials & Tools
- Fabric:
- Tree/Ornament: Various Christmas-themed prints (Greens, Reds, Golds, Ornaments prints).
- Background (Bricks): White or light cream fabric with small stars or dots.
- Borders: Red and Green Christmas prints for the corner triangles and outer border.
- Backing Fabric: For the back of the pillow cover.
- Notions: Rotary cutter, quilting ruler, cutting mat, sewing machine, thread (matching colors), batting (lightweight), and a pillow form (e.g., $18″ \times 18″$).
II. Designing and Cutting the Pieces
The design is based on a grid system where each “brick” in the background is a rectangle, and the tree is built using combinations of squares and HSTs.
- Determine Block Size: Decide the finished size of your background “brick” (e.g., $2″ \times 4″$ finished).
- Cut Background Bricks: Cut many white/star-print rectangles (e.g., $2.5″ \times 4.5″$ unfinished).
- Cut Tree/Ornament Squares: Cut various squares from your green, red, and ornament-themed fabrics for the center of the tree (e.g., $2.5″ \times 2.5″$ unfinished).
- Cut Half-Square Triangle (HST) Pairs: To form the slanted sides of the tree, you will need to create HSTs:
- Cut pairs of squares (one white background, one green tree print) slightly larger than the brick height (e.g., $4.5″ \times 4.5″$ squares).
III. Piecing the Half-Square Triangles (HSTs)
- Prepare HSTs: Place one white square and one green square right sides together. Draw a diagonal line corner-to-corner.
- Sew: Sew a $1/4″$ seam allowance on both sides of the drawn diagonal line.
- Cut and Press: Cut along the drawn line. Press the resulting two HSTs open. Trim them to the same size as your background bricks (e.g., $4″ \times 2″$ finished, or the size needed to fit your design).
IV. Assembling the Tree Design
- Layout the Grid: Lay out the pieces on a design wall or table in the shape of a Christmas tree, as seen in the image. The pattern is built row by row.
- Tree Trunk: Start at the bottom. The trunk is typically a square (or two) of brown fabric (or simply the bottom-most ornament squares).
- Build Rows: Sew the individual pieces (white bricks, green/ornament squares, and HSTs) together into horizontal rows.
- Join the Rows: Sew the completed rows together to form the central tree panel.
V. Adding Borders and Finishing
- Outer Border: Square up the finished tree panel. Cut and attach the red and green patterned border strips around the edge of the panel.
- Layer and Quilt: Create the quilt sandwich: Quilt Top, Batting, and Backing Fabric. Baste the three layers together.
- Quilt: Stitch through all three layers (e.g., stipple quilting or stitching along the lines of the bricks).
- Binding/Finishing: Trim the edges square and apply a final binding strip (often red or striped) around the perimeter, or sew the front to a backing piece (envelope closure or zipper) to create the finished pillow cover.