
Scrap Quilt
A Complete Step-by-Step Tutorial
What Is a Scrap Quilt?
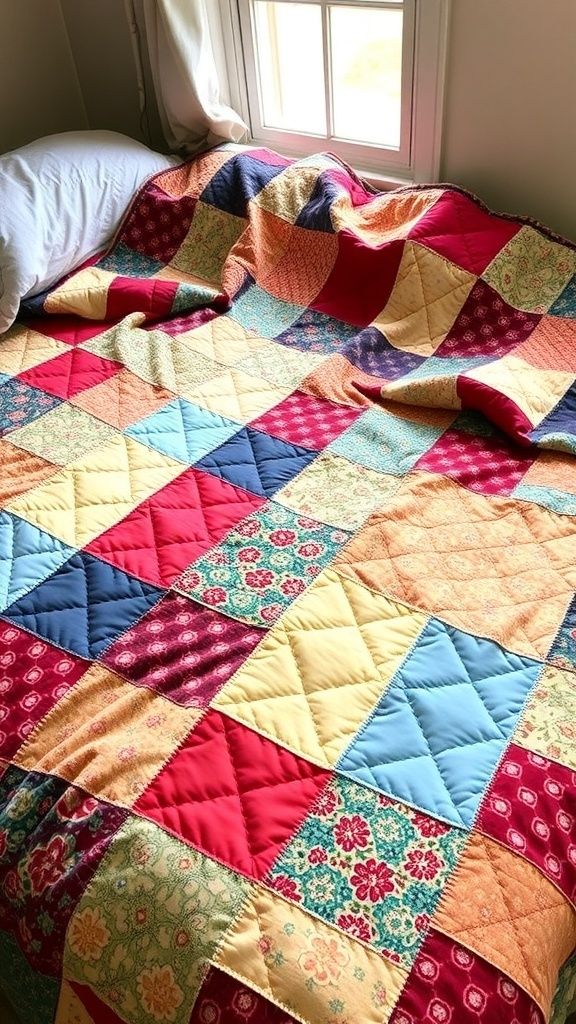
A Scrap Quilt is a quilt made from leftover pieces of fabric, commonly called scraps. Unlike quilts made from coordinated fabric collections, a scrap quilt celebrates variety by combining fabrics of different colors, prints, and sizes.
Every scrap quilt is unique because no two collections of scraps are exactly alike.
Scrap quilts are one of the oldest traditions in quilting, originally created as a practical way to use every usable piece of fabric rather than letting anything go to waste.
Quilting Vocabulary
| Term | Definition |
|---|---|
| Scrap | A leftover piece of fabric. |
| Scrap Quilt | A quilt made primarily from fabric scraps. |
| Patch | One individual piece of fabric sewn into a block. |
| Piecing | Sewing fabric pieces together to create blocks. |
| Quilt Top | The completed patchwork before quilting. |
| Backing | The fabric used for the back of the quilt. |
| Batting | The middle insulating layer of the quilt. |
| Binding | The fabric strip that finishes the edges of the quilt. |
| Fat Quarter | A quarter-yard of fabric cut into a rectangle approximately 18″ × 22″. |
| Charm Pack | A collection of pre-cut 5″ squares. |
| Layer Cake | A collection of pre-cut 10″ squares. |
| Jelly Roll | A collection of 2½” wide strips. |
| Chain Piecing | Sewing multiple pieces continuously without cutting the thread between them. |
| Nesting Seams | Aligning seams so they lock together when joining pieces. |
| Pressing | Using an iron to flatten seams without stretching the fabric. |
| Squaring Up | Trimming a block so it is perfectly square. |
| Quilt Sandwich | The three layers of a quilt: backing, batting, and quilt top. |
| Basting | Temporarily holding the quilt layers together before quilting. |
Choosing Your Scrap Fabrics
One of the biggest mistakes beginners make is thinking that any scraps will automatically work together.
A successful scrap quilt should have variety with balance.
Try to include:
- Large floral prints
- Small floral prints
- Geometric prints
- Dots
- Stripes
- Tone-on-tone fabrics
- Novelty prints
- Solids
- Low-volume prints
- Bright colors
- Dark colors
- Medium-value fabrics
A balanced mix creates movement and visual interest.
Fabric Requirements
For a throw-size quilt measuring approximately 60″ × 72″, you will need:
Quilt Top
Approximately:
- 5–6 yards of assorted quilting cotton scraps
Backing
- 4 yards of quilting cotton (or pieced backing)
Batting
- One piece measuring at least 66″ × 78″
Binding
- ½ yard of fabric
Fabric Selection Tips
Try to include fabrics from different value groups:
Light
Examples:
- White
- Cream
- Ivory
- Pale gray
- Light blue
- Soft yellow
Medium
Examples:
- Sage green
- Medium pink
- Denim blue
- Lavender
- Coral
Dark
Examples:
- Navy
- Black
- Burgundy
- Forest green
- Chocolate brown
A quilt with only medium-value fabrics often lacks contrast.
Essential Tools
You will need:
- Sewing machine
- Rotary cutter
- Self-healing cutting mat
- Acrylic quilting ruler
- Steam iron
- Ironing board
- Fine glass-head pins
- Thread
- Fabric scissors
- Seam ripper
- Fabric marking pencil
Optional:
- Rotating cutting mat
- Wool pressing mat
- Quarter-inch presser foot
- Walking foot
- Quilting gloves
Preparing Your Fabric
Step 1
Sort your scraps.
Separate them by:
- Color
- Value
- Size
- Print scale
Step 2
Remove:
- Frayed edges
- Uneven cuts
- Damaged pieces
- Thin or worn fabric
Step 3
Press every piece flat.
Wrinkled fabric leads to inaccurate cutting.
Step 4
Trim off selvages.
Never include selvages inside quilt blocks because they are woven more tightly than the rest of the fabric.
Choosing a Block Size
One of the easiest scrap quilts uses 5-inch finished squares.
Finished size:
5″
Unfinished size:
5½”
Each square should be cut at:
5½” × 5½”
Planning the Quilt
For a quilt measuring approximately 60″ × 72″:
Arrange:
12 squares across
14 squares down
Total:
168 squares
Designing the Layout
Spread all squares on a design wall or floor.
Avoid placing:
- Two identical fabrics side by side
- Similar colors touching too often
- Large dark areas
- Large light areas
The colors should appear evenly distributed across the quilt.
Stand back several feet to evaluate the overall balance.
Take a photo with your phone in black and white to check the distribution of light and dark values.
Sewing the Rows
Step 1
Pick up the first two squares.
Place them:
Right Sides Together (RST).
Align all edges carefully.
Pin if necessary.
Step 2
Sew using a ¼-inch seam allowance.
Step 3
Without cutting the thread, continue sewing the next pair.
This technique is called:
Chain Piecing.
Chain piecing is faster and keeps pieces organized.
Step 4
Once all pairs are sewn:
Separate them.
Press the seams.
Most quilters press to one side rather than pressing seams open.
Step 5
Add the next square to each unit.
Continue until the row is complete.
Joining the Rows
Place Row 1 on top of Row 2.
Right sides together.
Match every seam intersection.
Pin each seam.
Sew using a consistent ¼-inch seam.
Repeat until every row has been joined.
Nesting the Seams
If one row is pressed to the left and the next row is pressed to the right, the seams naturally lock together.
This is called nesting seams.
Nesting creates perfectly aligned intersections.
Squaring the Quilt Top
Lay the quilt top flat.
Check for:
- Wavy edges
- Bowing
- Uneven corners
Trim only if necessary.
Never remove more fabric than needed.
Preparing the Backing
Cut the backing fabric at least:
4 inches larger than the quilt top on every side.
Example:
Quilt Top:
60″ × 72″
Backing:
68″ × 80″
Making the Quilt Sandwich
Lay the backing:
Wrong side up.
Tape or clamp it so it is smooth but not stretched.
Lay the batting on top.
Smooth from the center outward.
Finally, place the quilt top:
Right side up.
Smooth carefully.
Basting
There are three common methods.
Safety Pins
Place curved safety pins every 4–5 inches across the quilt.
This is the most common method for beginners.
Spray Basting
Apply temporary quilt basting spray evenly between layers.
Work in sections to prevent wrinkles.
Thread Basting
Use long hand stitches to temporarily secure the three layers.
Preferred by some hand quilters.
Quilting the Layers Together
For beginners, the easiest quilting designs include:
- Straight lines
- Stitch in the ditch
- Crosshatch
- Diagonal grid
- Echo quilting
- Organic wavy lines
Always begin quilting near the center of the quilt and work outward to minimize shifting and puckering.
Trimming
After quilting:
Trim all layers evenly.
Use a long ruler and rotary cutter.
Make sure all four corners form perfect 90-degree angles.
Making the Binding
Cut binding strips:
2½ inches wide
Join the strips using diagonal seams.
Press the seams open.
Fold the long strip in half lengthwise with wrong sides together.
Press.
Attaching the Binding
Sew the raw edges of the folded binding to the front of the quilt using a ¼-inch seam.
Miter each corner carefully.
Join the beginning and ending tails neatly.
Fold the binding over the raw edge to the back of the quilt.
Secure it by hand with a blind stitch or by machine with a topstitch close to the folded edge.
Final Pressing
Give the finished quilt one last gentle press.
Avoid excessive steam, which can distort the quilt.
Trim any loose threads from both the front and back.
Caring for Your Scrap Quilt
- Wash in cold water using a gentle cycle.
- Use a mild detergent.
- Avoid bleach.
- Tumble dry on low heat or air dry.
- Store the quilt folded loosely in a cool, dry place.
- Avoid prolonged exposure to direct sunlight to prevent fading.
Common Beginner Mistakes
- Using inconsistent seam allowances.
- Skipping the pressing step.
- Not checking fabric value distribution.
- Stretching fabric while ironing.
- Forgetting to square up blocks when needed.
- Using fabrics with significantly different weights.
- Not securing the quilt layers properly before quilting.
- Rushing the layout without evaluating overall color balance.
- Trimming too aggressively before attaching the binding.
Professional Tips
- Keep a dedicated scrap bin organized by color and size.
- Cut leftover fabric into standard precut sizes (such as 2½”, 5″, or 10″) immediately after finishing a project.
- Mix large-scale prints with small-scale prints to create visual texture.
- Include a few solid fabrics to give the eye places to rest.
- Step back frequently during layout to assess balance and movement.
- Label your rows before sewing them together to avoid changing their order.
- Press after every seam for greater accuracy.
- Accuracy in cutting and a consistent ¼-inch seam allowance are more important than sewing speed.
- Remember that the beauty of a scrap quilt comes from its diversity—embrace variety rather than trying to make every fabric match perfectly.
