
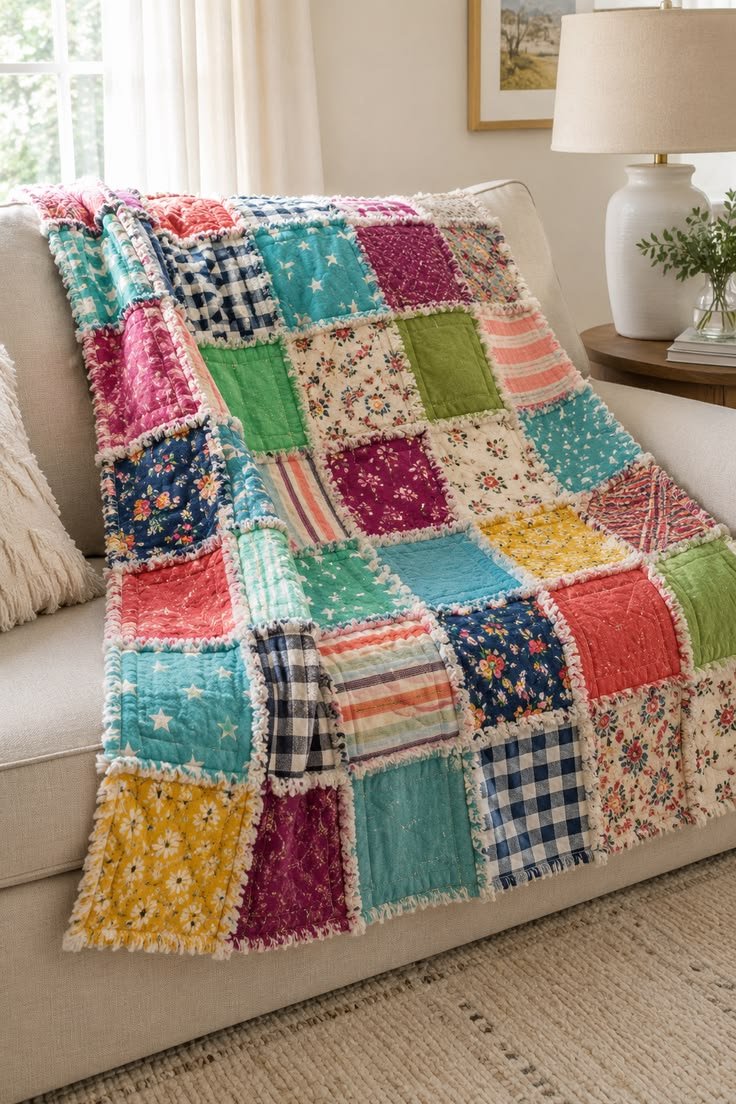
Classic Rag Quilt
Materials Needed
-
Top & Back Fabrics: Flannel or quilting cotton (flannel frayed best for a plush look)
-
Middle Layer: Flannel or low-loft batting
-
Tools: Rotary cutter, mat, ruler, thread, spring-action rag snips, and sewing machine
Step 1: Cut Your Squares
-
Cut top fabric, backing fabric, and middle batting into identical-sized squares (e.g., 8×8 inches for a standard lap quilt).
-
Note: Each finished block requires 1 top square, 1 middle square, and 1 back square.
Step 2: Sandwich and X-Stitch Individual Blocks
-
Layer one backing square face down, place the middle square on top, and top with one front square face up.
-
Sew an “X” from corner to corner across each individual sandwich to secure the three layers together.
Step 3: Join Blocks into Rows (Wrong Sides Together)
-
Place two completed sandwich blocks wrong sides together (backing fabrics touching).
-
Sew together using a 1-inch seam allowance.
-
Unlike traditional quilting, the seam allowances must remain on the front side of the quilt to create the exposed fray.
-
Continue sewing blocks end-to-end until your row is complete.
Step 4: Join the Rows
-
Lay two completed rows wrong sides together.
-
Match the seam intersections, pressing seam allowances open to reduce bulk.
-
Sew the rows together with a 1-inch seam allowance.
Step 5: Stitch the Border
-
Sew a 1-inch seam all the way around the outer perimeter of the assembled quilt top to lock all edges in place.
Step 6: Clip the Seams (Ragging)
-
Using rag snips, make cuts along all exposed seam allowances every 1/4 to 1/2 inch.
-
Cut close to the seam line, but do not cut into the stitches.
Step 7: Wash and Dry to Fray
-
Wash the quilt in cold water using a gentle cycle.
-
Tumble dry on medium heat to loosen fibers and create the signature fluffy, ragged edges. Clean your dryer lint trap halfway through.
Fabric & Sizing Tips
-
Flannel is King: 100% cotton flannel frays much better and creates a fuller, softer edge than standard quilting cotton. If using regular cotton for the top, pair it with flannel for the back.
-
Seam Allowance Flexibility: A 3/4-inch to 1-inch seam allowance works best. The wider the seam allowance, the longer and fluffier your frayed edges will be.
-
Skip Heavy Batting: Avoid thick polyester batting, which doesn’t fray and can clog your machine. Lightweight flannel or 100% cotton batting is ideal.
Sewing & Assembly Hacks
-
Use a Walking Foot: A walking foot helps feed all three layers evenly, preventing puckering during the “X” stitching and row assembly.
-
Nesting Seams: When joining rows, press seam allowances open at the intersections to keep bulk manageable for your needle.
-
Needle Choice: Use a heavy-duty or denim needle (size 90/14 or 100/16), especially when sewing across intersecting seams where multiple layers meet.
Clipping & Finishing Pro-Tips
-
Invest in Spring-Action Rag Snips: Regular fabric scissors will tire out your hand quickly. Spring-action snips open automatically, saving your grip.
-
Snip Distance: Clip about 1/4 inch to 3/8 inch apart, stopping roughly 1/8 inch before the seam line to avoid weakening the stitches.
-
Dryer Trap Warning: The first wash and dry cycle will release a massive amount of lint. Check and clean your dryer’s lint trap 2–3 times during the first drying cycle to prevent clogging or fire hazards.
-
Here is the breakdown for making a standard Queen Size rag quilt (approx. 88 x 96 inches / 223 x 244 cm):
Grid Layout & Dimensions
-
Block Cut Size: 8.5 x 8.5 inches
-
Seam Allowance: 1 inch (leaves a 6.5 x 6.5 inch finished block size)
-
Grid Pattern: 14 blocks wide × 15 blocks long
-
Total Blocks Needed: 210 finished block sandwiches
Fabric Requirements (Assuming 42″ Printable Fabric Width)
Layer Total Squares Needed Total Yardage Required Top Layer (Quilting Cotton or Flannel) 210 squares 11.5 yards (or equivalent in fat quarters/scraps) Middle Layer (Flannel or Cotton Batting) 210 squares 11.5 yards Backing Layer (Flannel) 210 squares 11.5 yards Queen Size Assembly Tips
-
Work in Sections: Sewing 14-block rows together at queen size gets heavy. Assemble the quilt into 3 or 4 smaller panels first, then join those panels together at the end.
-
Clip as You Go: Do not wait until the entire quilt is sewn to start snipping seam allowances. Clip individual rows or smaller sections before joining them to make the clipping phase far less exhausting.
-
Support the Weight: When sewing the final rows together, keep an extra table or chair to your left so the weight of the quilt doesn’t drag down on your machine needle.
-