
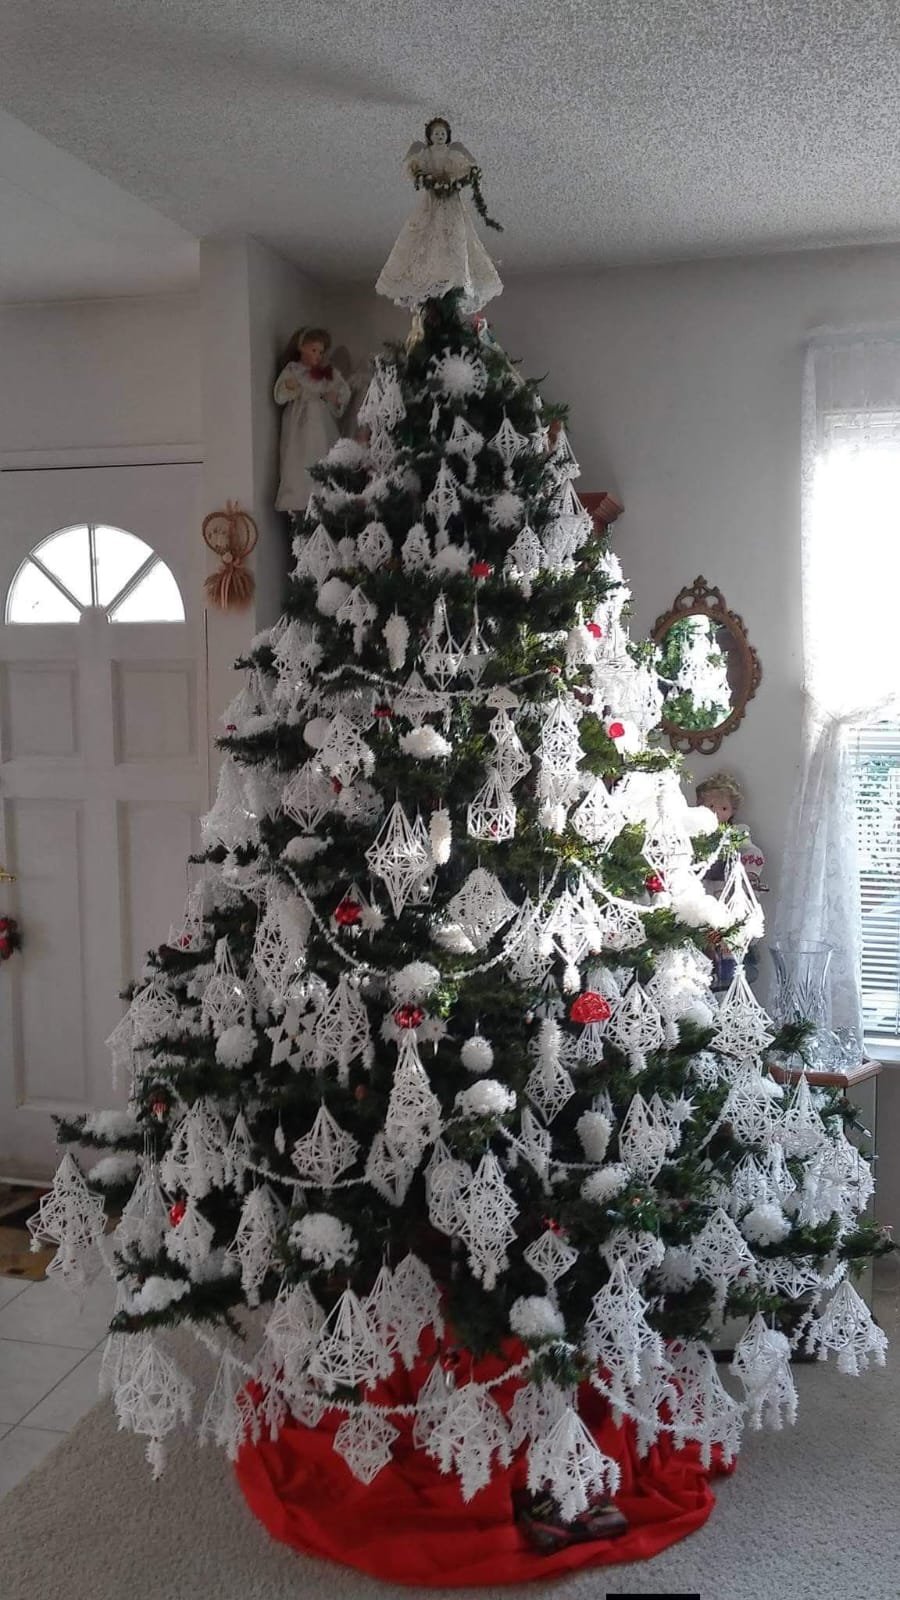
DIY White Crochet Christmas Tree Ornaments
Materials
-
White crochet cotton thread (size 10 or 20).
-
Crochet hook 1.25 mm to 1.75 mm.
-
Fabric stiffener or diluted white craft glue.
-
Small balloons or geometric molds.
-
Sewing needle.
-
Scissors.
-
White sewing thread for hanging.
Abbreviations (US crochet terms)
| Abbreviation | Meaning |
|---|---|
| ch | Chain |
| sl st | Slip stitch |
| sc | Single crochet |
| dc | Double crochet |
| tr | Treble crochet |
| sp | Space |
| st(s) | Stitch(es) |
| rep | Repeat |
1. Three-dimensional diamond ornament
Step 1 – Create the first panel
-
Chain 4 and join with a slip stitch to form a ring.
-
Chain 3 (counts as first dc).
-
Work 11 dc into the ring.
-
Join with a slip stitch.
Step 2 – Create the openwork
-
Chain 5.
-
Skip 2 stitches and work 1 sc into the next stitch.
-
Repeat around the circle.
-
Join with a slip stitch.
-
In each chain space, work: 1 sc, 3 ch, 1 sc.
Step 3 – Make the second panel
Repeat the same instructions to create an identical piece.
Step 4 – Join the panels
-
Place both panels together.
-
Join their edges using slip stitches and small chain spaces.
-
Leave a small opening at the top.
-
Insert a small amount of cotton or use a cardboard diamond-shaped support to maintain the shape.
-
Close the opening and attach a hanging loop.
Step 5 – Stiffen
Brush with fabric stiffener and shape the ornament. Allow it to dry completely.
Note: This is an adapted diamond design, not an exact reconstruction of the ornaments in the photograph.
2. Crochet snowflake ornament
-
Chain 6 and join with a slip stitch to form a ring.
-
Chain 3, then work 11 dc into the ring.
-
Join with a slip stitch.
-
For each point, work:
-
5 ch.
-
1 sc in the second chain from the hook.
-
1 hdc in the next chain.
-
1 dc in the next chain.
-
1 tr in the last chain.
-
-
Skip 1 stitch on the base and join with a slip stitch.
-
Repeat until you have six snowflake points.
-
Fasten off and weave in the ends.
-
Stiffen and block into shape.
3. Round crochet Christmas ornament
Step 1 – Crochet the ornament
-
Make a magic ring.
-
Work 6 sc into the ring.
-
Round 2: 2 sc in each stitch (12 stitches).
-
Round 3: 1 sc, 2 sc in next stitch; repeat around (18 stitches).
-
Round 4: 2 sc, 2 sc in next stitch; repeat around (24 stitches).
-
Work 2 rounds of sc without increases.
-
Begin decreasing to create the second half.
-
Leave a small opening for shaping.
Step 2 – Shape the ornament
-
Inflate a small balloon to the desired size.
-
Place the crocheted cover over the balloon.
-
Apply fabric stiffener evenly.
-
Allow it to dry completely.
-
Carefully pop and remove the balloon.
-
Attach a hanging loop.
4. Long diamond-shaped ornament
-
Chain 4 and join into a ring.
-
Work 8 sc into the ring.
-
Create chain arches around the ring using 5 chains and 1 sc between arches.
-
On the next round, work smaller chain arches inside the previous spaces.
-
Repeat, gradually reducing the size of the chain spaces toward the bottom.
-
Make two identical pieces.
-
Join the pieces along their edges, forming an elongated three-dimensional diamond.
-
Stiffen and shape using a cardboard template.
Finishing touches for a vintage Christmas tree
To achieve the delicate appearance of the tree in your photograph:
-
Use only white cotton thread.
-
Keep the tension consistent.
-
Apply stiffener to maintain the geometric shapes.
-
Mix small, medium, and large ornaments.
-
Add white crocheted balls and snowflakes between the geometric pieces.
-
Use thin white thread for hanging.
My suggestion: If you’re creating a crochet tutorial article for your website, I’d develop these into a collection of 5–6 individual patterns, with exact stitch counts, finished measurements, and printable instructions. The geometric diamond ornaments are particularly beautiful for a vintage-inspired Christmas tree.