
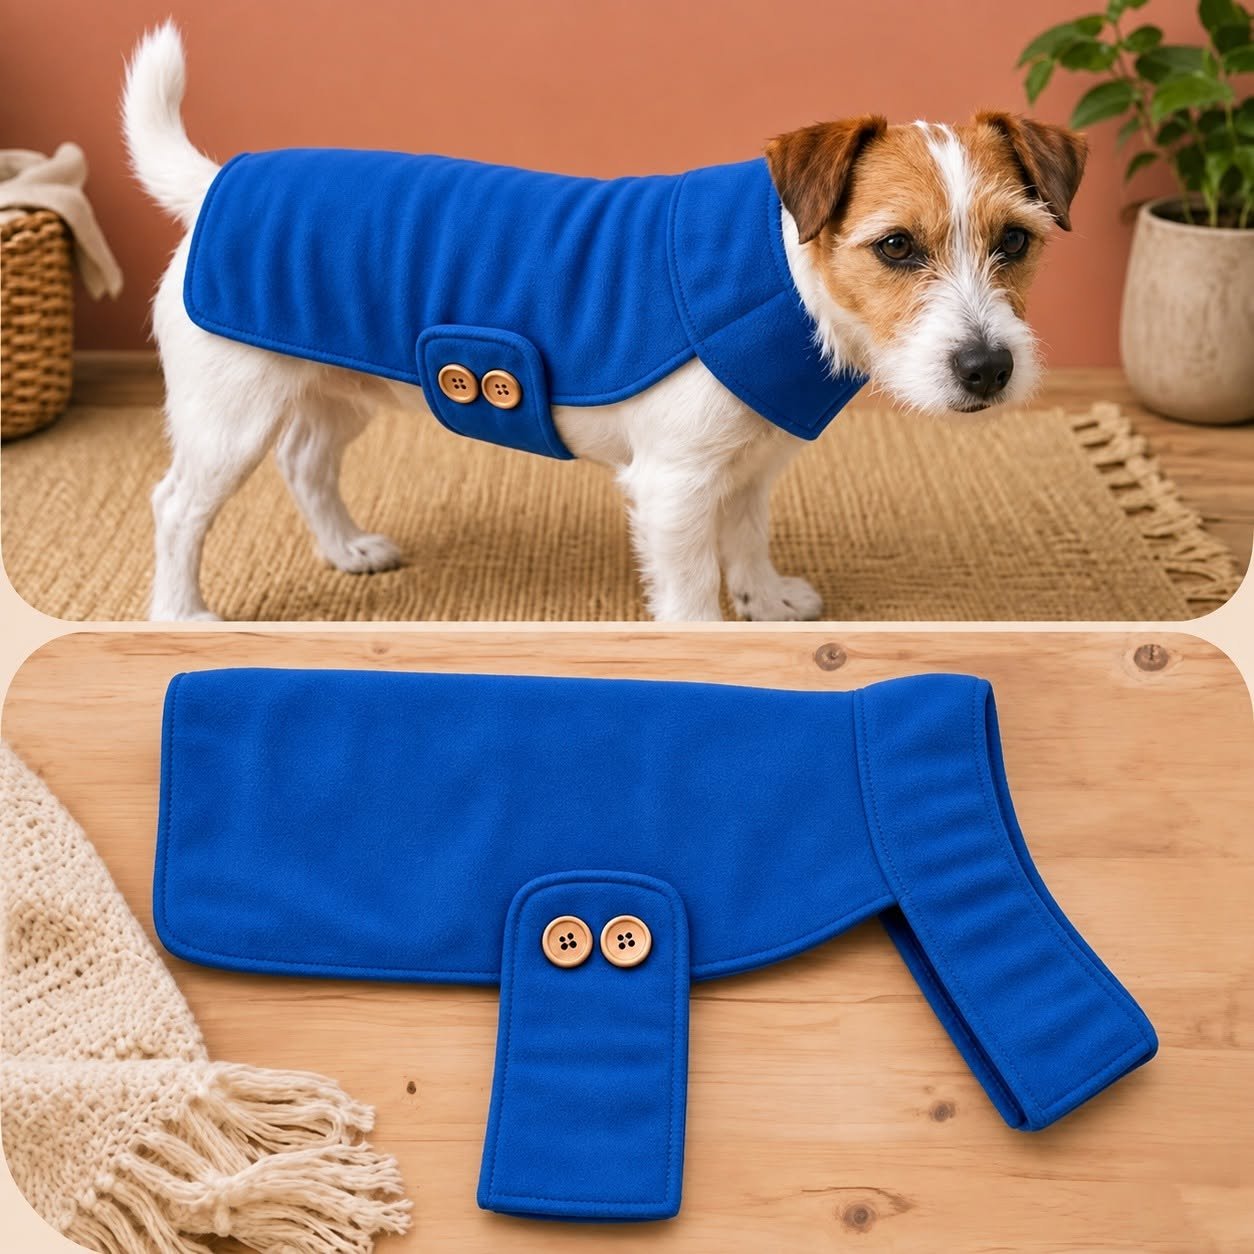
Dog Coat Sewing Pattern
This DIY dog coat sewing pattern is a simple project for making a comfortable and stylish homemade dog jacket. It is a great sewing project for beginners and can be customized to fit your dog perfectly.
Materials
- Medium-weight fabric or fleece
- Matching sewing thread
- 2 buttons
- Sewing machine
- Fabric scissors
- Measuring tape
- Pins or sewing clips
- Fabric marker or chalk
- Iron
Step 1: Measure Your Dog
Before cutting the fabric, take your dog’s measurements.
Measure:
- Back length: from the base of the neck to the base of the tail
- Chest circumference: around the widest part of the chest
- Neck circumference: around the base of the neck
- Chest width: from one side of the chest to the other
Add approximately 1–2 cm (⅜–¾ inch) for seam allowance.
Tip: Take your measurements while your dog is standing naturally. This will help you create a coat that is comfortable and allows your dog to move freely.
Step 2: Create the Dog Coat Pattern
Draw the main body of the coat on paper using your dog’s back length and chest measurements.
The pattern should have:
- A rounded neckline
- A straight or slightly curved back
- Open areas around the legs
- A wider section around the chest
For the best fit, compare the paper pattern against your dog’s back before cutting the fabric.
Step 3: Cut the Fabric
Place the pattern on the fabric and carefully trace around it.
Cut the main coat piece, remembering to include your seam allowance.
You will also need to cut:
- The main body
- The neck/collar section
- The front fastening flap
Step 4: Sew the Main Body
Fold the fabric edges inward and press them with an iron.
Sew around the outer edges using a straight stitch.
Take your time around the curves, especially around the neckline and chest area.
For a cleaner finish, you can use a zigzag stitch or overlock stitch on the raw edges.
Step 5: Add the Neck Piece
Attach the neck piece to the neckline of the coat.
Pin it carefully first and check that the opening is large enough for your dog’s head and neck.
Sew around the neckline, then press the seam flat.
Step 6: Make the Button Closure
Create the front fastening piece by folding and sewing the edges.
Position it underneath the coat so it can wrap around your dog’s chest.
Sew two buttons onto the fastening flap, just like the blue dog coat shown in the example.
Make sure the buttons are securely attached.
Safety tip: If your dog tends to chew on clothing, consider replacing buttons with snaps, Velcro, or another secure closure.
Step 7: Try the Coat on Your Dog
Carefully put the finished coat on your dog.
Check that:
- Your dog can walk comfortably.
- The legs have plenty of room to move.
- The neckline isn’t too tight.
- The coat doesn’t restrict breathing.
- Your dog can sit and lie down comfortably.
Make small adjustments if necessary.
Step 8: Finish and Press
Trim any loose threads and press the finished coat with an iron.
Your DIY dog coat is now ready!
Final Result
This simple homemade dog jacket can be made in different fabrics, colors, and sizes. You can also personalize it with decorative buttons, embroidery, appliqué, or your dog’s name.
SEO Keywords
Primary keyword: DIY dog coat sewing pattern
Secondary keywords:
- homemade dog coat
- dog jacket sewing pattern
- DIY dog jacket
- easy dog coat sewing tutorial
- dog clothes sewing pattern
- small dog coat pattern
- handmade dog jacket
- sewing for dogs
- dog coat tutorial for beginners